An automation is a campaign that will perform automated tasks like sending messages (e.g emails or SMS) to contacts or sending contact data to other services via Zapier or to Pipedrive with our custom integration with it.
You just need to set triggers and define actions to make Route do all the work for you.
How to create an automation in Route?
To create an automation, you just need to set triggers and choose the actions to be performed.
1. To create an automation, go to the Automations menu and click on the Create Automation This will take you to the Create Automation screen.
![]()
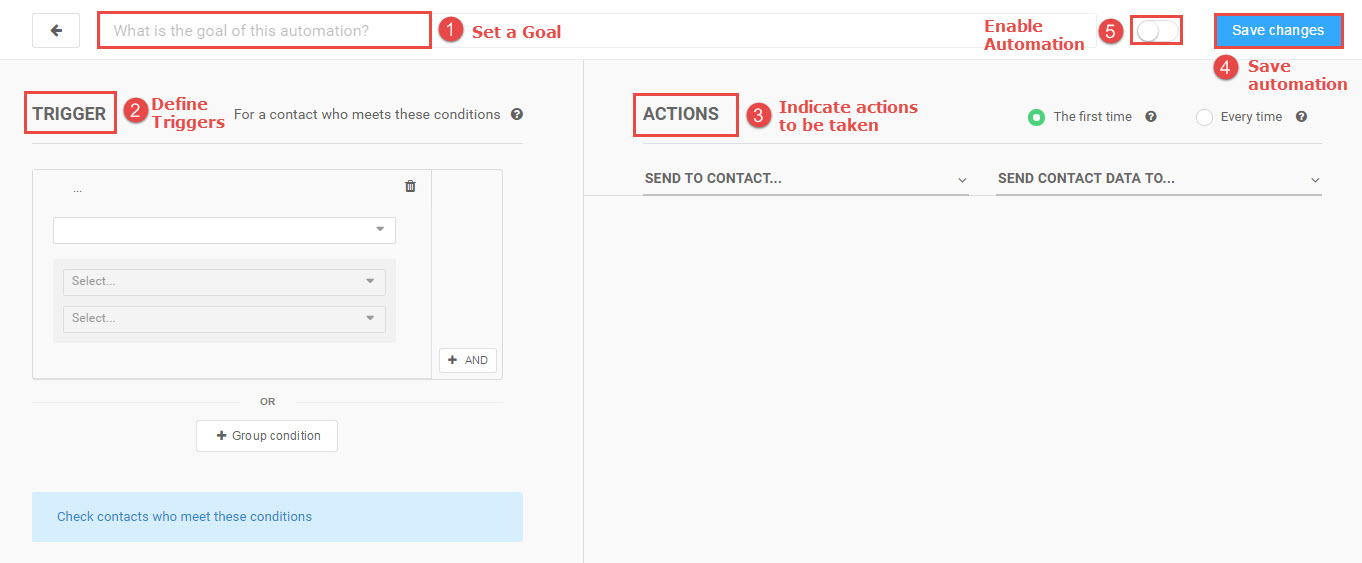 2. Set a goal for your automation. For example, our goal is to Schedule a Demo.
![]()
3. Define a trigger or a group of triggers that will set off the automation. Triggers are conditions based on the contact and event data that you have collected using Route.
Route offers the following triggers –
- Attributes – The contact information that you’ve collected.
- UTMs – Lead interaction with the URLs that you’re using.
- Events – Contact behavior that you’re tracking using our Visual Mode or JavaScript/API.
- Forms – Forms on your website that are mapped with our Forms feature.
- Emails – Email metrics such as delivery, opens, clicks, and replies.
- Imports – .CSV files of contacts that you imported to Route.
- Segments – Contact segments based on behavior or actions.
- Agents – Contacts assigned to a specific agent.
- Third party applications – Events sent from third-party applications that are integrated to Route.
In our example, we’re using the following trigger:

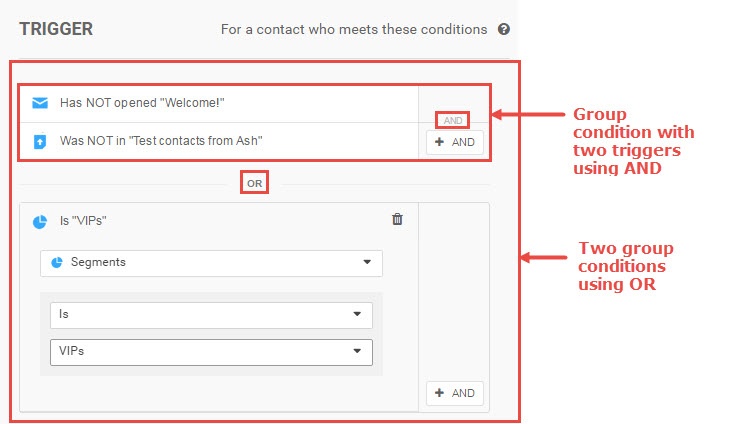
4. You can set a single trigger or a group of triggers. These are the trigger combinations that you can set –
- Group conditions with two triggers (AND condition)– The automation will be set off for contacts that meet the conditions for both the triggers.
- Two group conditions (OR condition) – The automation will be set off if contacts meet either of the two group conditions.
In our case, we’ve set the following triggers:
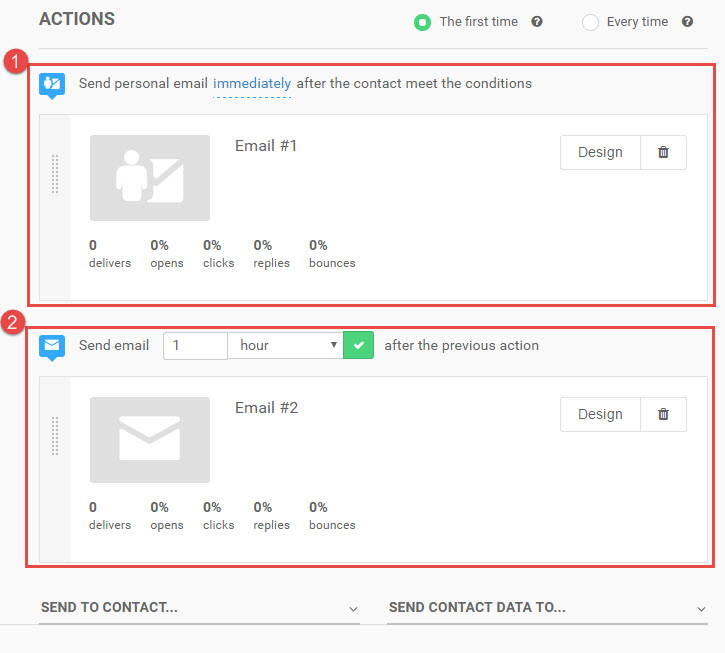
5. Indicate the actions to be taken once your trigger conditions are met. You’ll notice that there are two options for the action to be taken.
- If your campaign is a behavioral campaign, then choose the option The first time.
- If your campaign is a transactional campaign, then choose the option Every time.

You’ll also notice that there are two types of actions that you can take – send automated messages (such as emails) to a contact or send contact information to a third party application such as Zapier or Pipedrive.
In our case, we’re scheduling two actions to be performed once the trigger conditions are met.
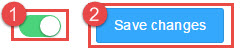
6. Click on Save Changes to save your automation as a draft. The actions won’t start until you enable and save it.
![]()
7. When you’re ready to start an automated campaign enable it and then hit save.
Note: Once you enable your automation, you’ll have two options:
- Start the campaign only from the moment you enabled to the future: This is the default option. It will initiate the automation campaign only for future contacts that meet your conditions. Contacts that you had added to your database in the past might also satisfy the conditions you’ve set. However, these contacts won’t receive your automation.
- Start the campaign for every contact that meets the condition: Contacts that you had added to your database in the past might also satisfy the conditions you’ve set. If you wish to send your automation to these contacts, then choose this option. Route will then send your automated messages to existing contacts as well as new contacts that might satisfy the conditions set.
That’s it! Your automation campaign is now active. Once the actions are performed, you’ll be able to see the corresponding performance metrics.
What is the difference between a behavioral campaign and a transactional campaign?
The goal of a behavioral campaign is to record the details of a contact that matches the conditions that trigger the campaign. Which is why behavioral campaigns can be run only once per contact.
The goal of a transactional campaign is to perform an action every time a contact meets the conditions that trigger the campaign. That’s why transactional campaigns can be run more than once.
When to use it?
Use automations for behavioral campaigns, and transactional campaigns. This is because these campaigns consist of a series of actions depending on the behavior, characteristics, and actions taken by a contact.
In Route, you can also use automations for sending contact data to other services such as Zapier and Pipedrive. This would ensure that all your services stay updated with the information you’ve gathered in Route.
Important information about Automations
As we have to handle a great amount of data, we have created ways to better organize this data so that your automations can run smoothly. However, there are some factors that can impact the campaigns you create:
- The number of emails scheduled for a campaign;
- The number of events that will be processed and sent back to Route by the email provider (SendGrid);
- The number of Events you are tracking with your account;
- The number of Imports being done.
Sometimes you might come across an instance wherein the number of contacts that match the triggers is different from the number of emails sent.
For example, your trigger shows you that there are 500 contacts that satisfy the trigger conditions you’ve set. However, only 250 contacts received the campaign.
In such case, you should check the option you chose while enabling the automation.
Next: Learn more about creating Broadcast campaigns in Route.