Pipedrive is a simple to use CRM focused on helping sales people of small sales teams.
As they say on their website: “Sales CRM for small teams with big ambitions”.
What can I do with this integration?
With this integration you can send contact information you capture with Route to your Pipedrive account and get events and people from your Pipedrive account to start engaging with them on Route.
Pipedrive To Route:
Use data from Pipedrive to fuel Route with valuable information. Use this information to trigger campaigns.
- New Contact – Add a new contact on Route when you add he(she) to your Pipedrive.
- Update Contact – Triggers when your contacts on Pipedrive change status and deals.
Route to Pipedrive:
From a campaign you create on Route, automate some tasks on Pipedrive
- Create Person – Add a new Person only if he(she) doesn’t exists.
- Update Person – Update this Person if he(she) already exists.
- Create Organization – Add a new Organization if it doesn’t exists.
- Create or Update a Deal – Add a new Deal if the Person doesn’t have, otherwise update the Person’s Deal stage.
- Create Activity – Add an Activity to this Person on Pipedrive.
- Create Note – Add a Note to this Person on Pipedrive.
Use cases
- Everytime a person fill a form on your website, you could send him/her to Pipedrive.
- Everytime a new person is added to Pipedrive, you could trigger a lead nutrition campaign that will send useful e-mails to them, periodically and automatically.
- When a person click on an important email link he/she could be updated on sales pipeline.
- When a person do an important action on your site or app, you could send a note to Pipedrive.
- And much more, depending of your creativity! 😉
Follow these steps to integrate Route with Pipedrive
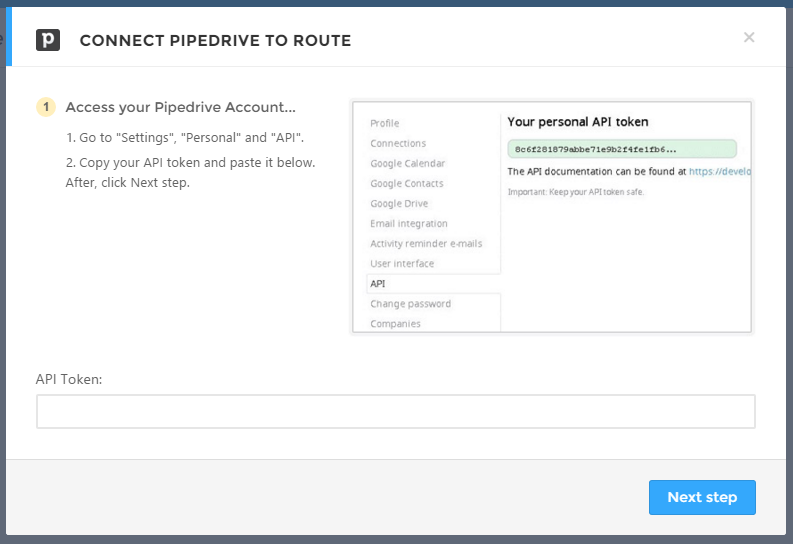
- Access your Pipedrive Account and go to “Settings” > “Personal” > “API”;
-
On your Route account go to “Integrations” > “3rd Party” > Pipedrive. You’ll see the following setup screen. Copy your Pipedrive API token and paste it in the API Token field, as below. After, click Next step.
-
Route’ll show you some data to be copy-pasted on your Pipedrive account, so come back to Pipedrive.
-
Still on “Settings” area, go to “Push notifications” and click on “Create new notification”;
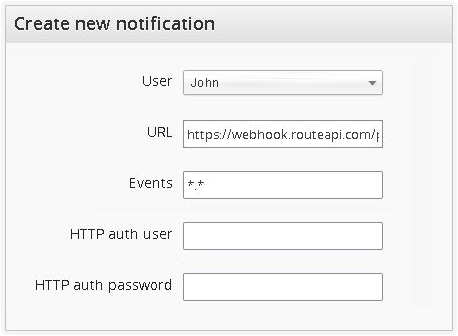
- Copy the URL generated by Route and paste it in the “URL” field. Go to your account to get the URL;
- Still on Pipedrive, where it says events, add “.” (without quotes, which means ‘all events’);
- Where it says “HTTP auth user”, paste your Route Organization Id and your Route Api Key as “HTTP auth password”. You’ll find both inside the Pipedrive integration screen. Save your push notification;
-
Coming back to Pipedrive setup on Route, you need to map the Pipedrive’s events to events on Route, as shown below (in doubt, let all checked). In the left are the Pipedrive event’s names, and at right, the names on Route (change as needed) when this event happen;
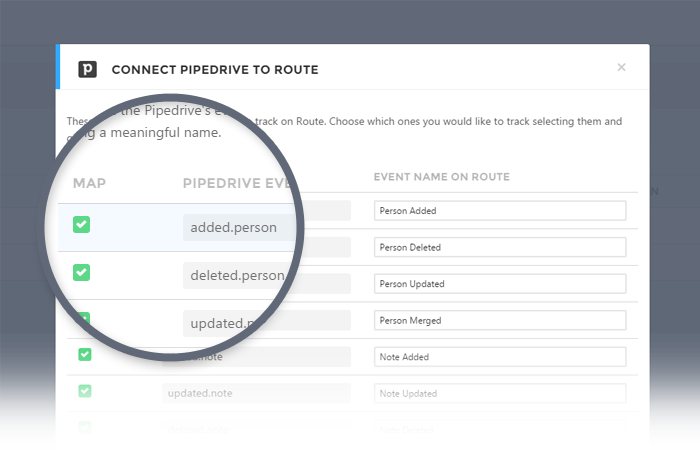
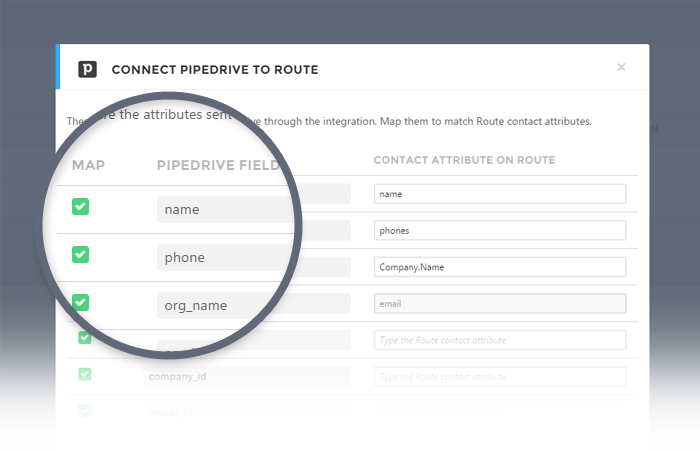
-
Still on Route, click Next and you’ll be able to match Pipedrive’s contact attributes to Route’s contact attributes. In the left are the Pipedrive person’s fields, and at right, the contact attribute’s name on Route (check and customize all that apply for you). Pipedrive custom fields (if you use any) will be shown too, but with their codes (long alphanumerical word, see notes at the bottom of this page). It’s required to match the attribute email;
- Enable and save the integration to finish it.
Important information about Route + Pipedrive
- If you use custom fields on Pipedrive you can use it on Route too: Go to your Pipedrive account > Settings > Customize fields > People and take note of the Field name and Field API key of the custom fields you want to use with Route. Later, when you be setting up your Route + Pipedrive integration (if you already did it, go again to Route > Integration > Pipedrive and click on Setup in the right corner) you’ll some weird codes in the map attributes pane (step 9 in the guide above). Use the notes taken previously and map to a meaningful name, save and we do the rest!
Next: Integrate with Olark